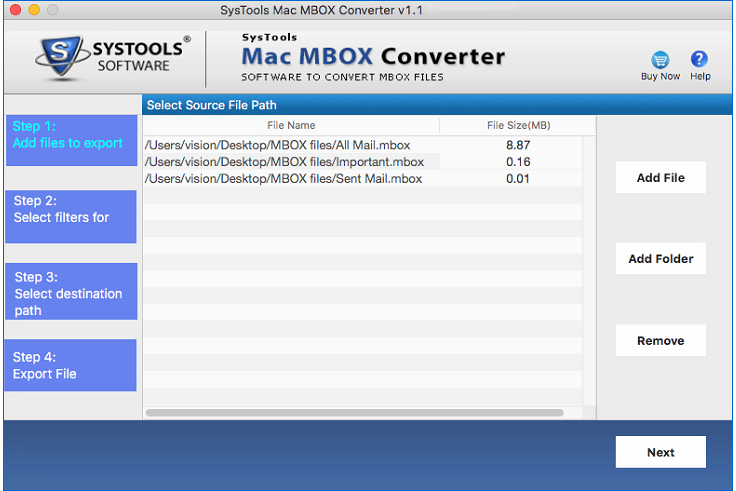
Step 1
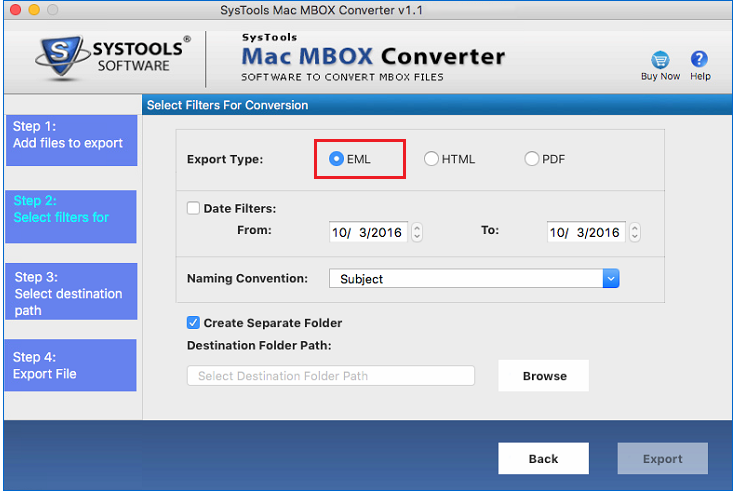
Click on EML radio button to export the MBOX file to the EML file format.
Step 2
The export progress begins, it will take a few minutes (according to size of MBOX files)
Step 3
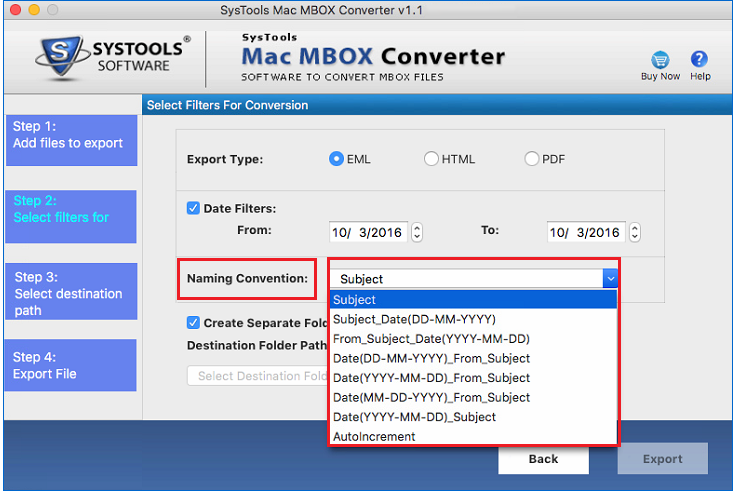
Naming Convention: Select the naming convention to save the emails accordingly. By default, Subject is the naming convention of the file.
Step 4
Create Separate Folder: To create a separate folder at the destination location to save the EML files.
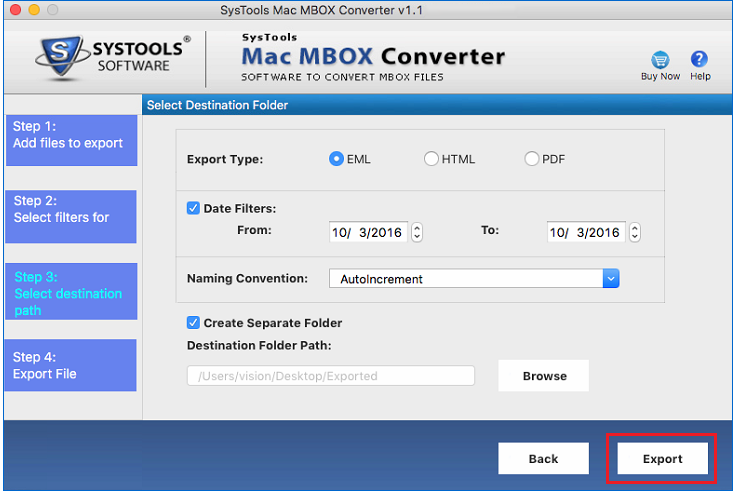
Click on Browse button to select destination location.

Step 5
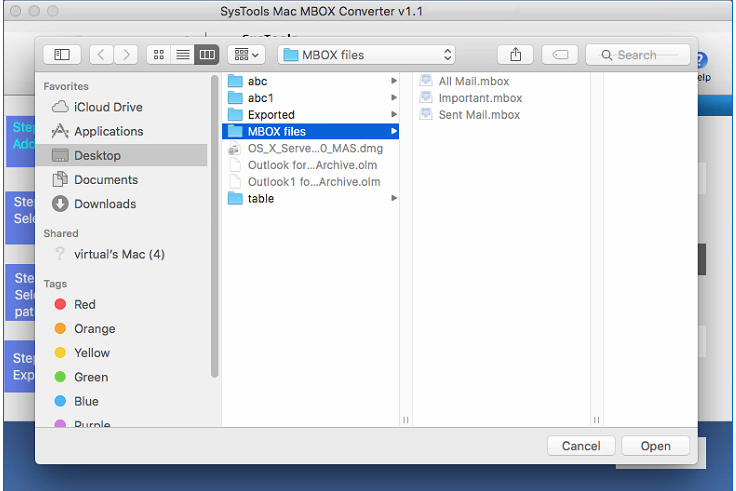
Navigate to the destination location and click on Open button.

Step 6
Now click on Export button.
Step 7
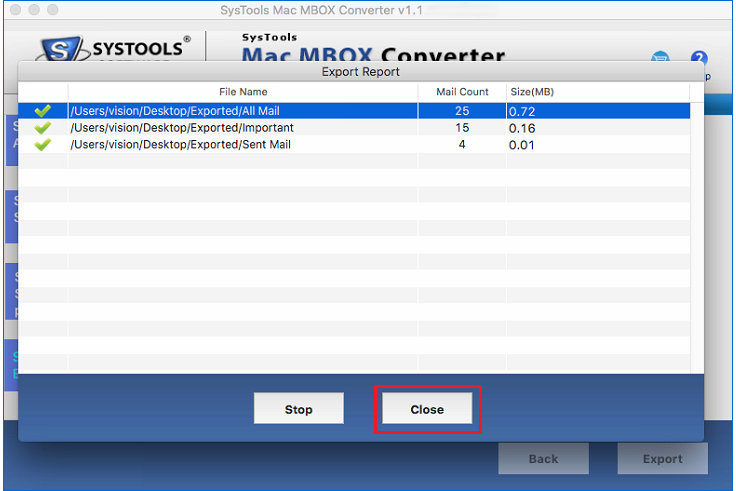
Now a window appears which shows the Export success status. Click on Close button.
Step 8
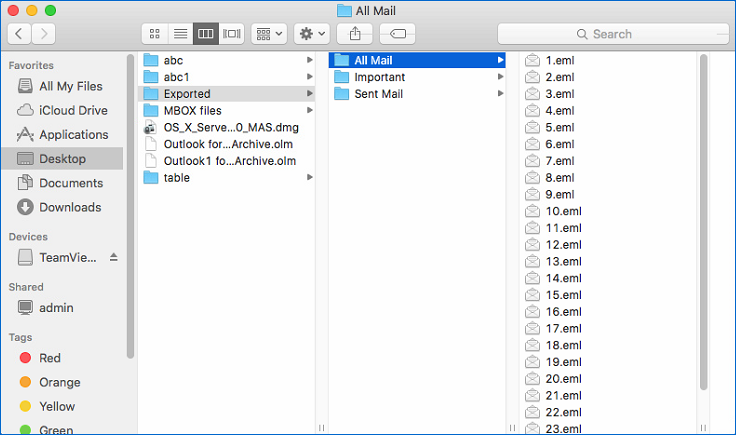
Now you can see all MBOX emails are converted to EML format at the destination location.
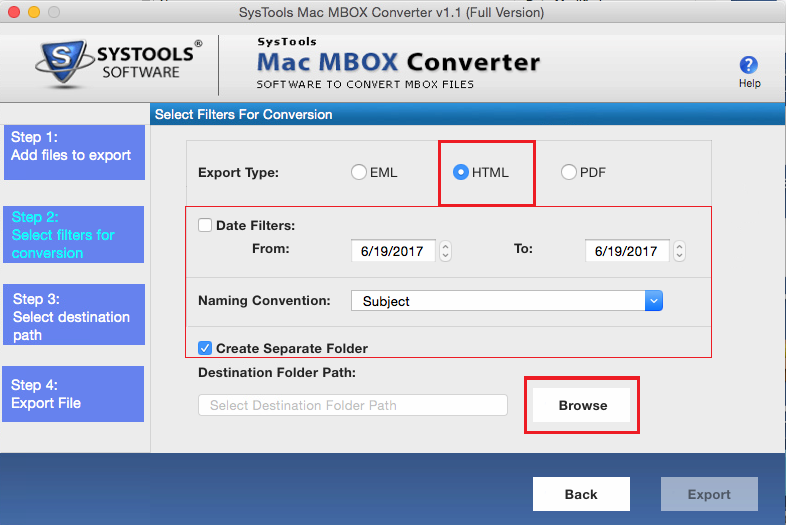
Step 1
- Click on HTML radio button to export the MBOX file in HTML file format.
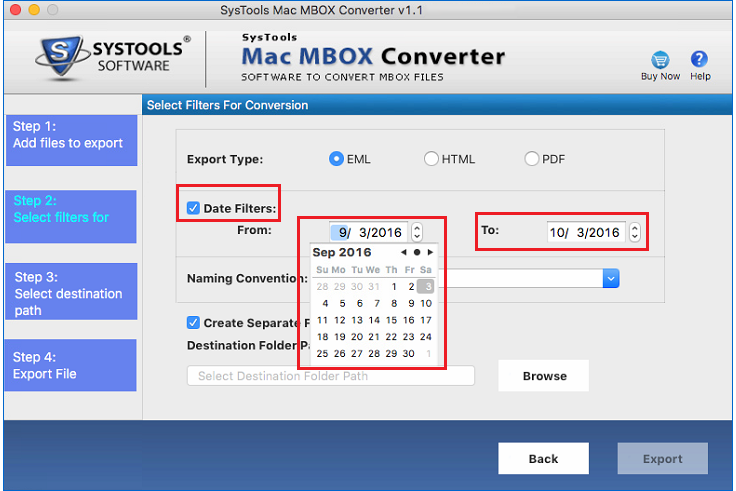
- Date Filters: You can apply Date Filter to select and export email messages of the specific duration.
- Maintain Folder Hierarchy: You can maintain folder structure and keep your data in same way as it was in the MBOX file.
- Naming Convention: Select the naming convention to save the emails accordingly. By default, Subject is the naming convention of the file.
- Create Separate Folder: To create separate folder in the destination location to save email messages in HTML format.
- Now click on Browse button and navigate to the destination location where you want to save the HTML file.
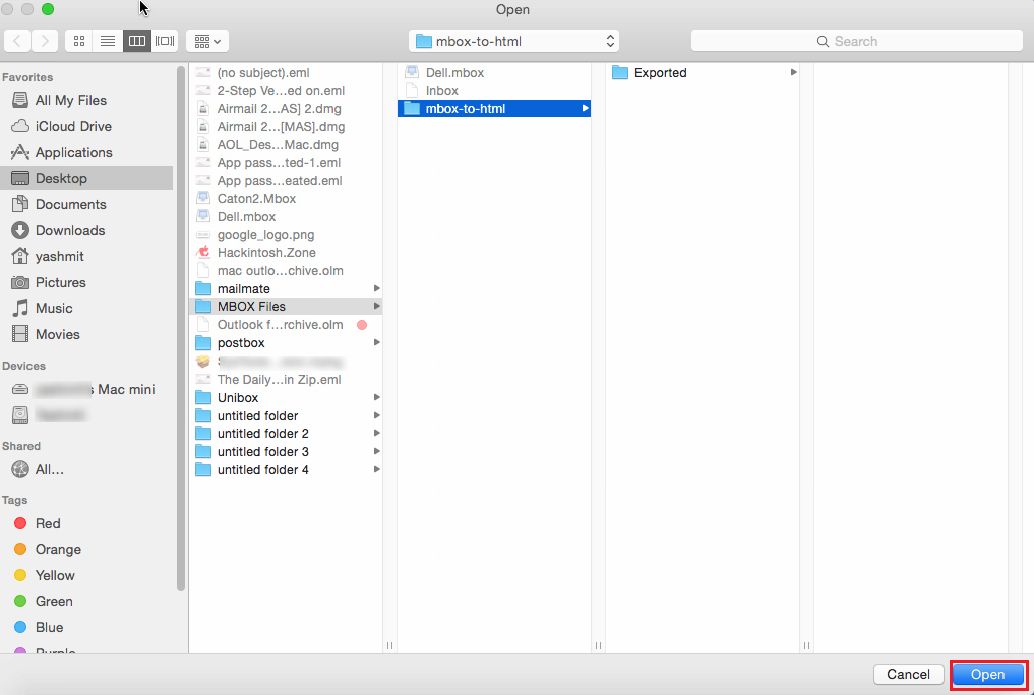
Step 2
Navigate to the destination location and then click on Open button.
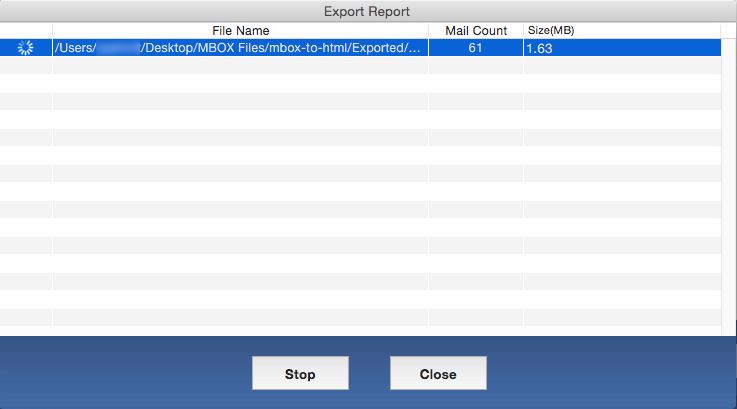
Step 3
Now Export process will start as shown.
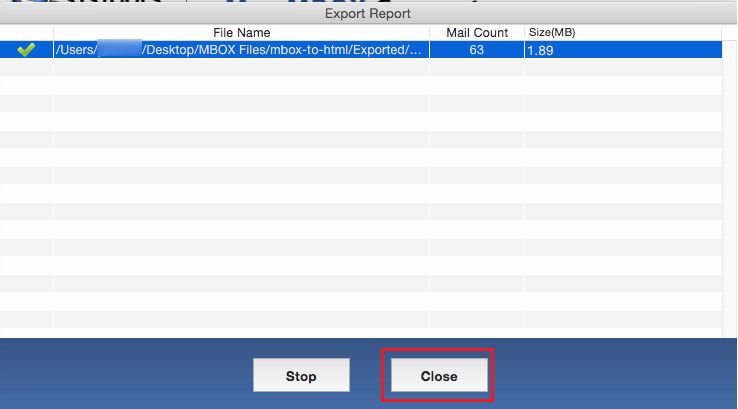
Step 4
Now you can see that the file is successfully exported. Click on Close button.
Step 5
Browse to the destination location and view all the emails in HTML file format.
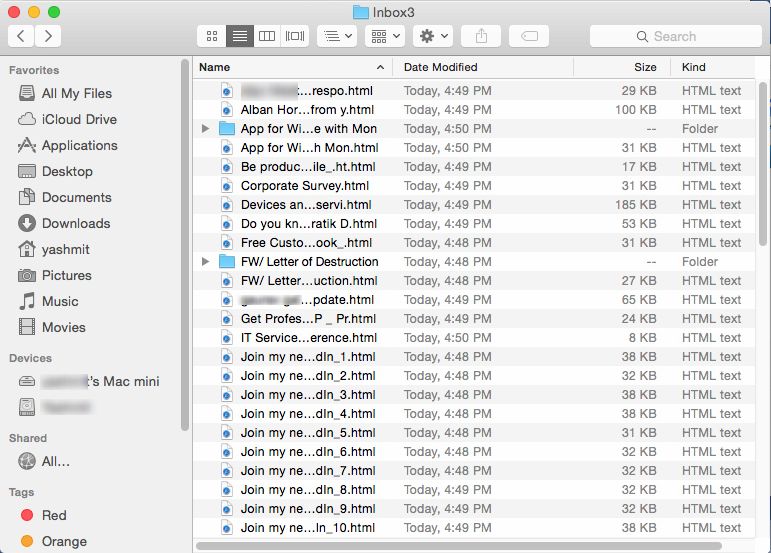
Step 6
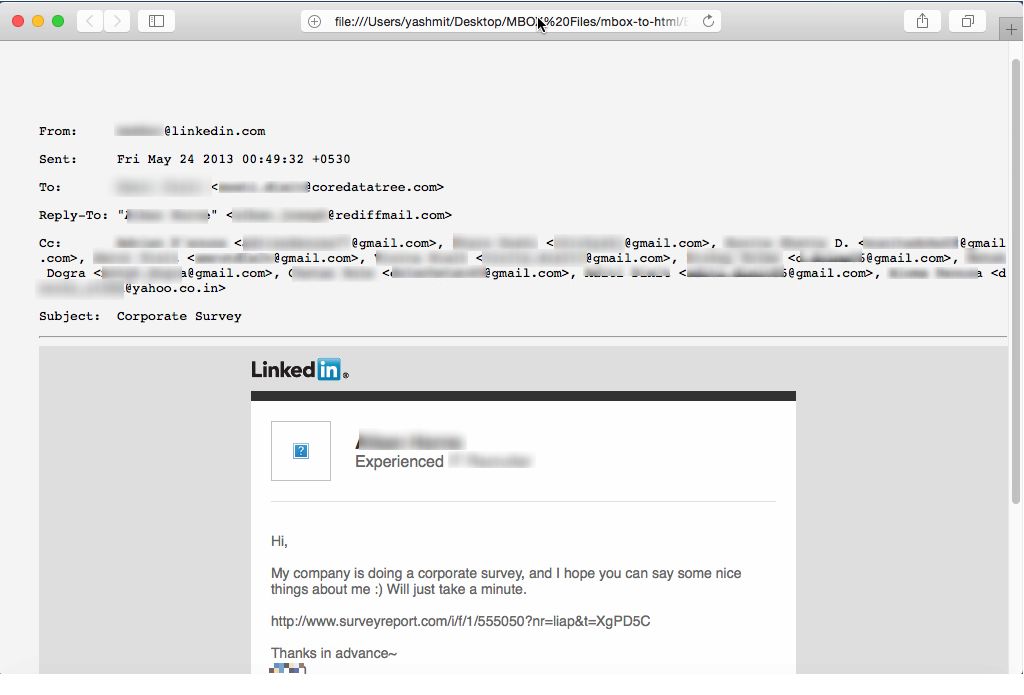
Open any email and view the contents of the email.
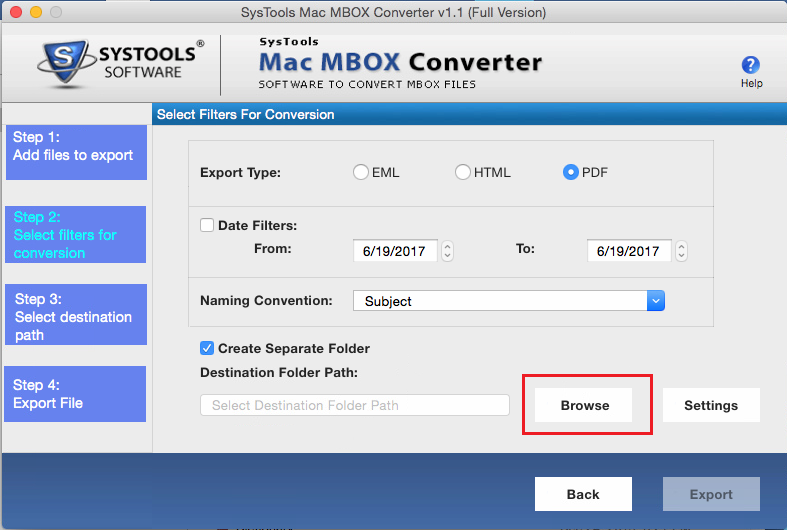
Step 1
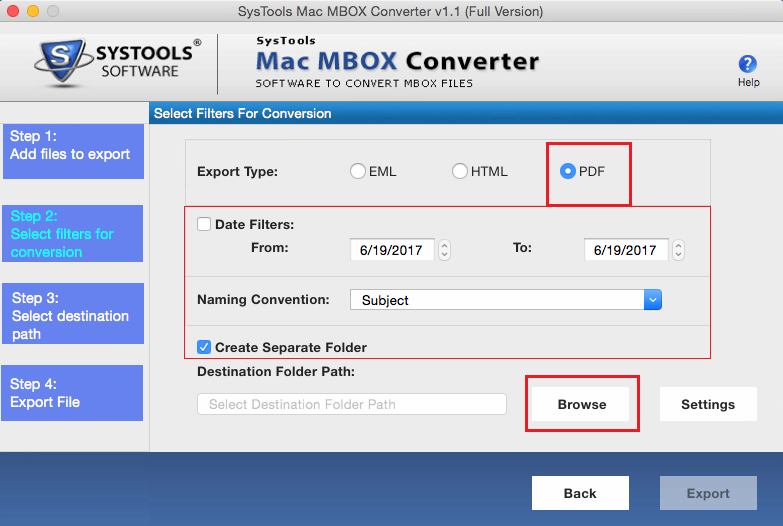
- Click on PDF radio button to export the MBOX file in HTML file format.
- Date Filters: You can apply Date Filter to select and export email messages of the specific duration.
- Maintain Folder Hierarchy: You can maintain folder structure and keep your data in same way as it was in the MBOX file.
- Naming Convention: Select the naming convention to save the emails accordingly. By default, Subject is the naming convention of the file.
- Create Separate Folder: To create separate folder in the destination location to save email messages in PDF format.
- Now click on Settings button and apply further settings.
Step 2
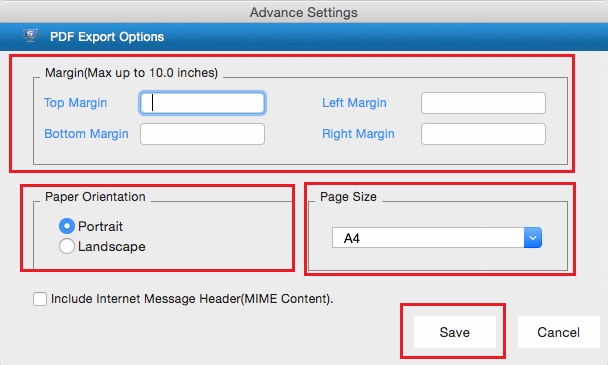
- A PDF Export Options window will appear. Apply layout settings for PDF file format.
- Margin: You can apply margin settings to maintain proper space in top, bottom, left and right directions.
- Paper Orientaion: You can choose orientation of the PDF file i.e Potrait or Landscape.
- Page Size: You can select the size of the PDF page.
- MIME Content: You can select this check box to include Internet Message Header.
- Click on Save button to save the settings.
Step 3
Click on Browse button to navigate the destination location where you want to save the PDF emails.
Step 4
Navigate to the destination location and then click on Open button.

Step 5
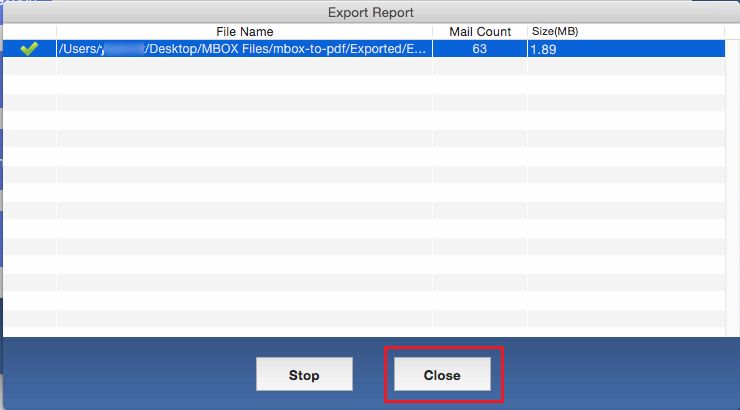
Now Export process will start as shown.

Step 6
Now you can see that the file is successfully exported. Click on Close button.
Step 7
Browse to the destination location and view all the emails in PDF file format.
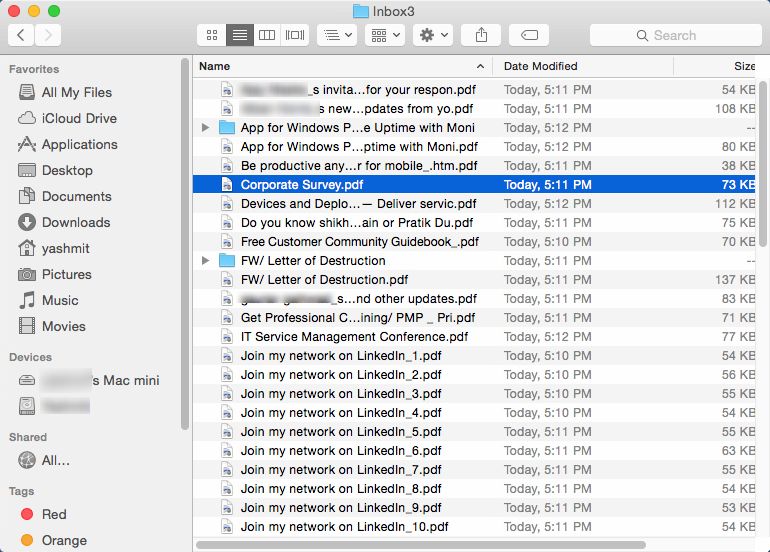
Step 8
Open any email and view the contents of the email.